
DocuSign Integration Setup
symplr Contract supports digital signatures (e-signatures) by integrating with DocuSign, an independent service unaffiliated with symplr. Customers who want to use digital signatures in symplr Contract must first obtain an appropriate DocuSign license and configure it to function optimally within symplr Contract workflows. This article details how to obtain and configure DocuSign for use with symplr Contract.
Step 1: Obtain a compatible DocuSign license
Who’s responsible: Customer
Ensure DocuSign plan compatibility.
Only Enhanced Plans are compatible with symplr Contract integration.
DocuSign plans and pricing information can be found at DocuSign Pricing.
For new DocuSign accounts:
Secure an enterprise-level DocuSign account with sufficient envelope capacity.
Contact DocuSign Sales at 877-720-2040 and follow the prompts.
Alternatively, you may contact Drew Korb at DocuSign, Account Executive – Healthcare & Life Sciences at drew.korb@DocuSign.com.
To upgrade existing accounts (if necessary), contact your DocuSign sales representative to increase envelope limits or alter your account.
DocuSign plans that limit annual envelope usage per user are insufficient because symplr Contract acts as a "user" for the purpose of counting envelopes.
Step 2: Create a DocuSign Integration User
Who’s responsible: Customer
Create an email account for the Integration User.
The integration between symplr Contract and DocuSign requires that the customer use a single administrative account, which we call the "Integration User.” This account acts as connection point between the two systems.
It is best practice for the customer's IT team to create and use a generic email account with a name such as symplrContractDocuSign@customername.org. This protects the integration in case an employee leaves the organization.
Create a user account in DocuSign for the Integration User:
Sign in to DocuSign as an administrator and create a new user account with admin rights for the Integration User.
Name this user something neutral, such as “sContract Admin” and use the new email address created in step 1.
Reference DocuSign Support:
Visit support.DocuSign.com for detailed instructions on creating new users and assigning permissions.
Step 3: Grant symplr Contract consent to create envelopes
Who’s responsible: Customer
Prepare for setup:
Ensure both the Admin and the new integration user accounts are signed out of DocuSign before proceeding.
Sign in as the Integration User:
Click this link: DocuSign Consent Link
IMPORTANT: Sign in using the Integration User's credentials. Verify that the user icon in the top right corner shows the Integration User.
Grant consent:
When prompted, agree to allow symplr Contract to send envelopes via the Integration User account.
Verify success:
A 404 page (e.g., "Nothing Here") will appear after consent. This is expected and indicates successful completion.
Step 4: Provide Integration User Details to symplr
Who’s responsible: Customer
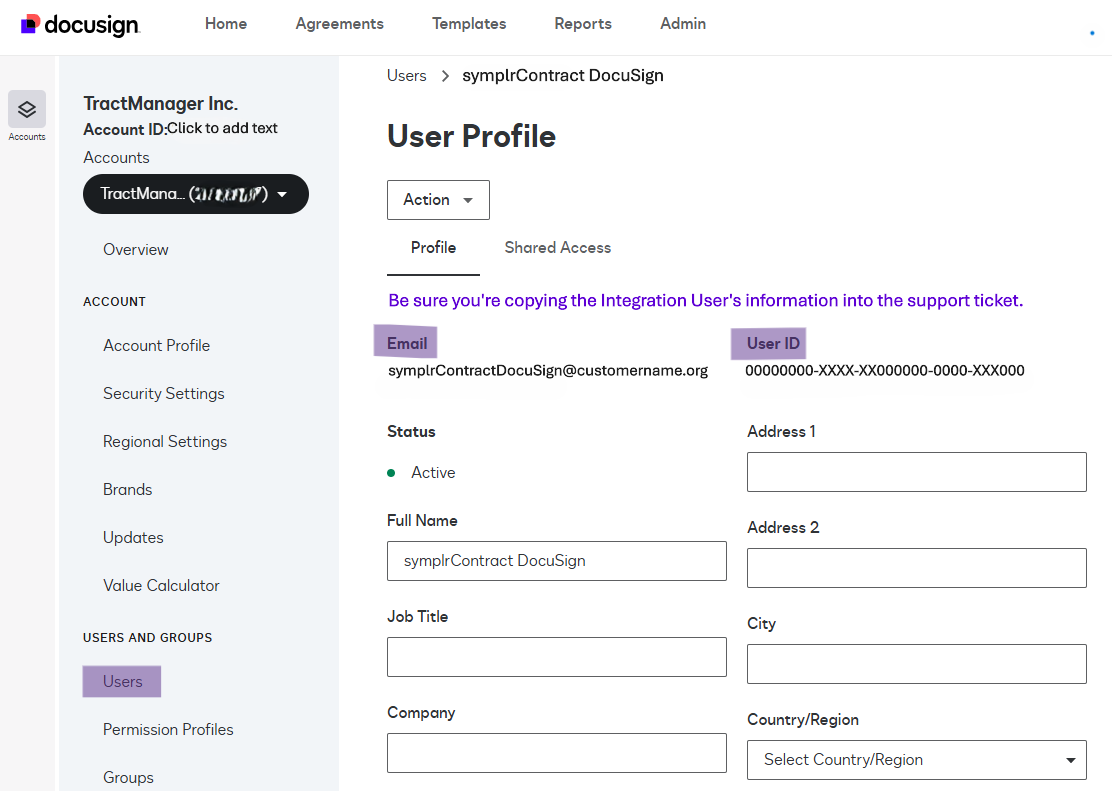
Access user details:
Navigate to DocuSign Admin and sign in as an admin. (View the screenshot below.)
Locate the Integration User (e.g., symplr Contract Admin) in the user list.
Obtain the required information:
Copy the User ID (API Username) from the user profile. Avoid confusing this with the API Account ID.
Note the associated email address for reference.
Open a support ticket with symplr:
Submit a request through your symplr project team, or to the symplr Service Desk by emailing helpdesktm@symplr.com
Provide the following information with your request:
The Integration User's User ID (API Username).
The email address associated with the Integration User.
Specify whether the integration is for the production or training tenant.
Step 5: Submit Integration Details to symplr
Who’s responsible: symplr
Backend Configuration: symplr engineers will associate the DocuSign Integration User with the appropriate customer tenant.
Step 6: Make All Configuration Settings
Who’s responsible: Customer
Configure DocuSign settings:
The integration between symplr Contract and DocuSign requires that specific settings are configured within DocuSign
Review and ensure all DocuSign Setting Recommendations have been followed and set correctly.
Step 7: Test the Integration
Who’s responsible: Customer and symplr
Run a test workflow in the designated environment (production or training) to ensure the integration functions as expected.
Troubleshoot any issues:
If the test fails, go back to Step 3 to confirm the consent process was completed correctly.
Follow the troubleshooting steps provided in the symplr documentation.